
How to Change the Retrieve on the SEiGLER Fly Reel
This guide will work for all SEiGLER Lever Drag Fly Reels (SF, MF, & BF). All SEiGLER Lever Drag Fly Reels are built from the factory in the Left Hand Retrieve unless otherwise specified. This is a two-part process: 1) Changing Retrieve and 2) Changing Drag Lever Direction. Please complete both parts to ensure proper function. (Video at the bottom of page)
Part 1: Changing Retrieve
Step 1: Remove Hub Cap
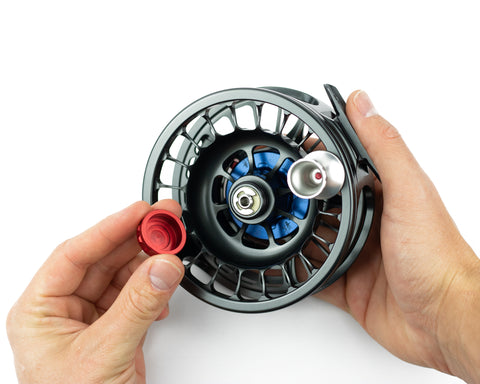
The red hub cap is locked onto the fly reel by a rubber O-ring. To remove the hub cap, grasp the cap with your fingers and pull away from the fly reel. If it is difficult to come off, pull and twist simultaneously.
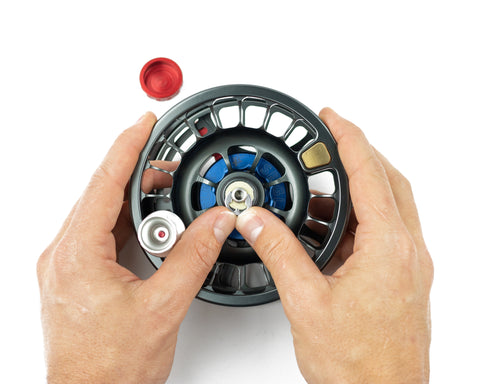
Step 2: Remove E-clip
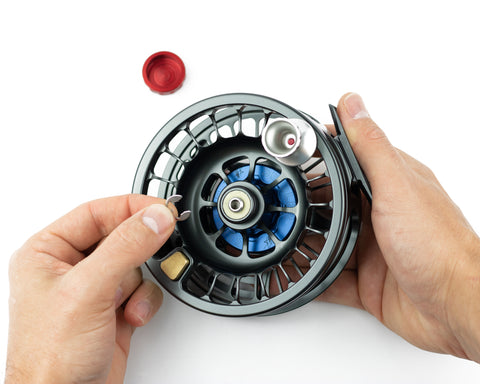
To remove the E-clip, apply pressure with fingers and push the E-clip away and upward. You can easily remove E-clip with a removal tool, needle-nose pliers, small flathead screwdriver, or hook. Be careful not to scratch the spool or Igus washer when using a tool. Click HERE for a more in-depth guide to removing an E-clip.
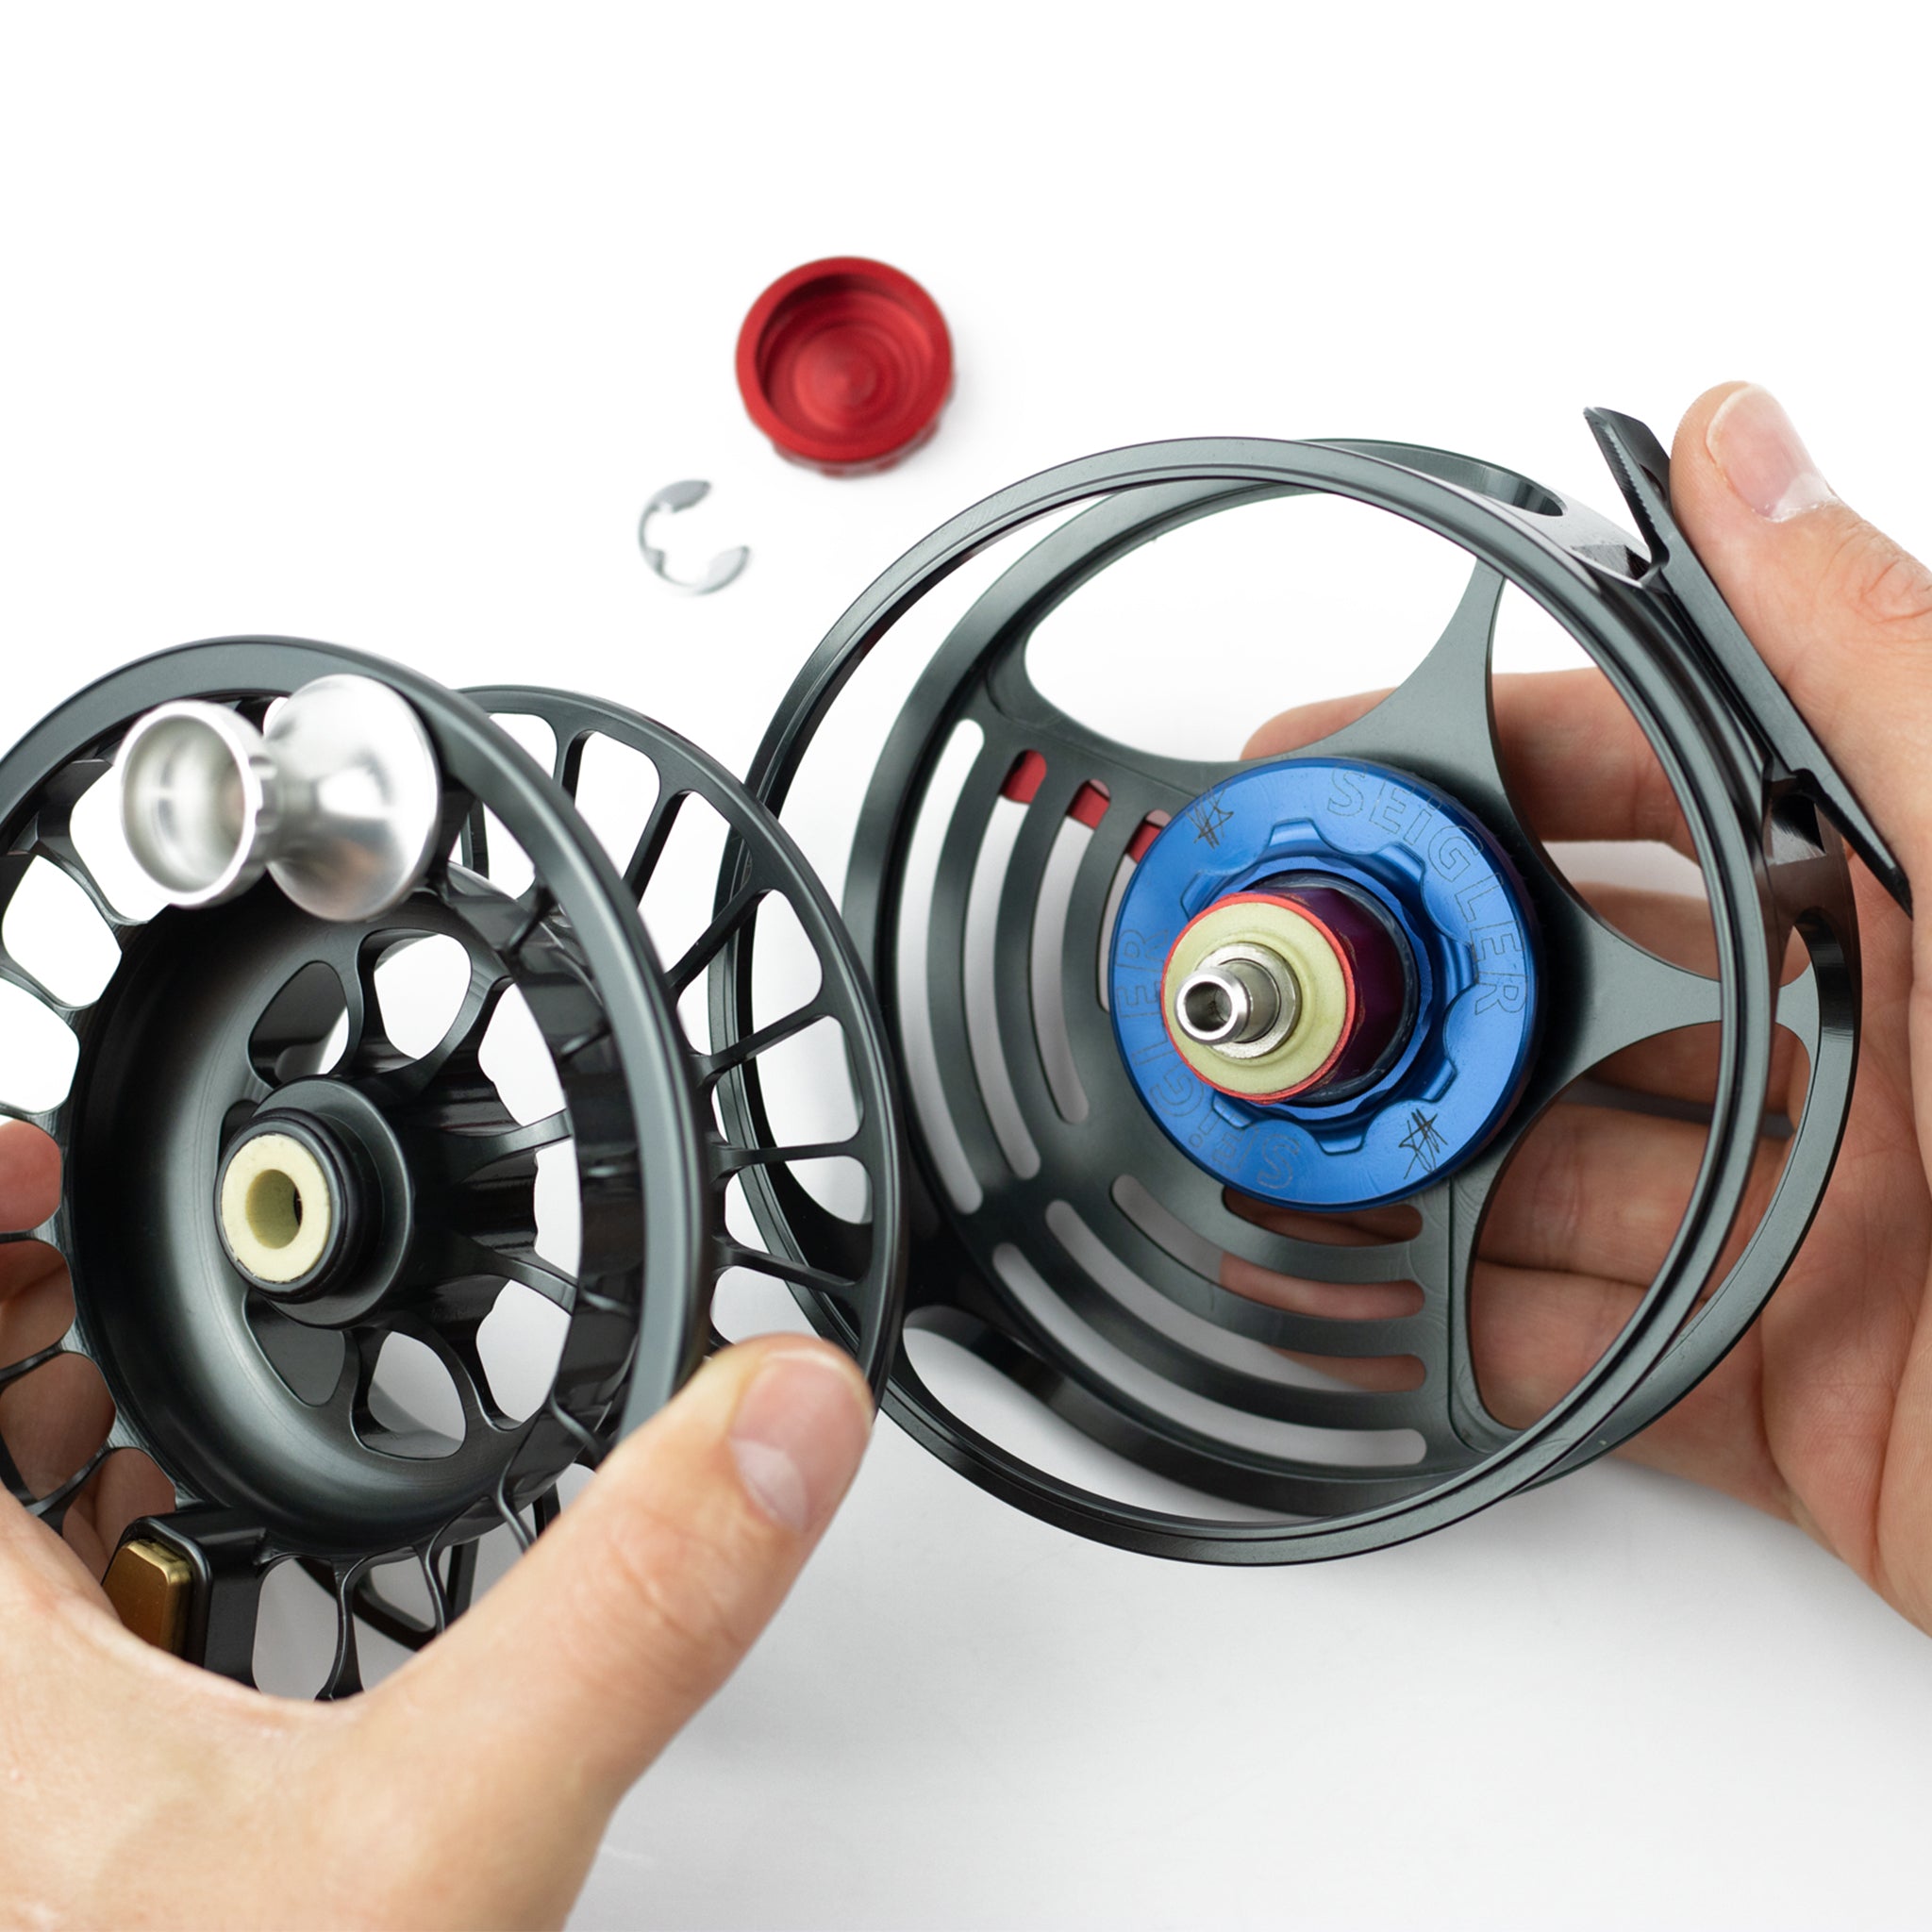
Step 3: Remove Spool
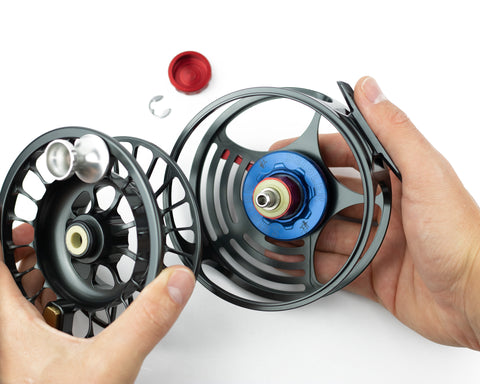
Hold the fly reel main case as pictured above and separate the spool by pulling away from each other.
Step 4: Change Retrieve
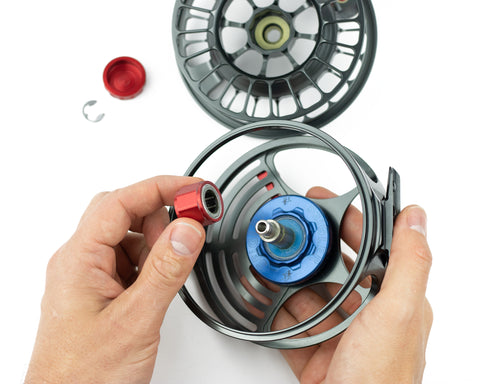
To change retrieve, remove the anti-reverse bearing from the shaft, flip the bearing upside down, and reinstall on the shaft. Be sure that the tan Igus washer remains on the outside of the bearing. (Please note: The anti-reverse bearing may be red or silver)
Step 4: Reassemble the Fly Reel
Place the spool back onto the fly reel main case and install the E-clip. It is very important to place the flat side of the E-clip against the tan Igus washer. Use both thumbs and apply pressure until the E-clip is fastened around the shaft. Place the red hub cap back onto the fly reel straight and spin it 3-4 complete revolutions. This will ensure the hub cap releases any trapped air and will sit on the reel straight.
Part 2: Changing Drag Lever Direction
Step 1: Remove Preset Dial
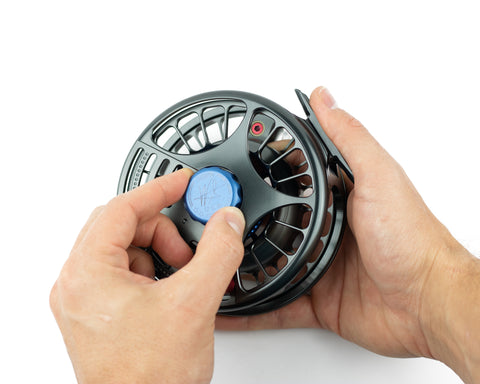
To remove the blue preset dial, unscrew the dial counterclockwise until it becomes free.
Step 2: Remove the Drag Lever
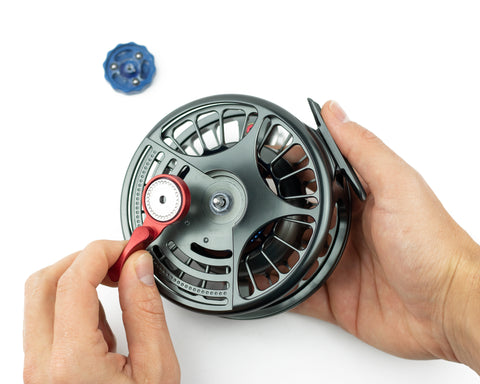
Lift the red drag lever away from the fly reel. Next, remove the cam from the drag lever. The cam is the silver circular part with dimples inside the drag lever.
Step 3: Change Cams
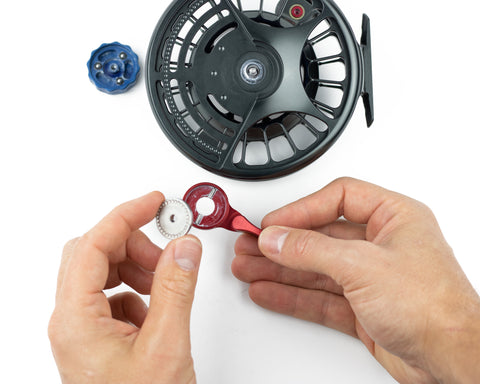
You can find your other cam inside your Travel Kit. Place new cam inside the red drag lever dimple side up. Be sure the silver dowels stay inside the lever in their slots.
Step 4: Reassemble Drag Lever and Preset Dial
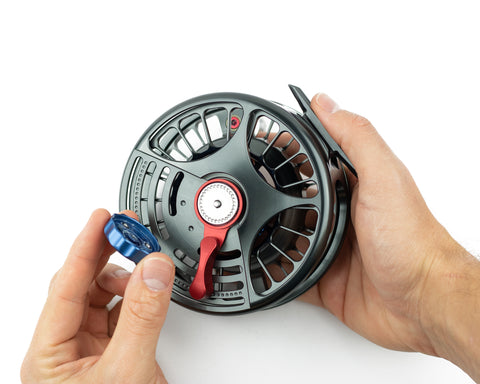
Place drag lever back onto the fly reel and screw on the blue preset dial by screwing it clockwise. We recommend placing the drag lever in the middle position and tighten the preset dial until slightly snug.
Step 5: Test
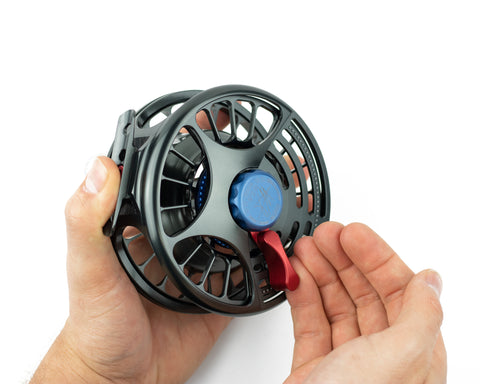
*Shown in the Left-Hand Configuration
Test the retrieve by placing the reel in your hands and rotate the spool as if you were reeling in. If you reverse the rotation, you should feel resistance which is your drag. To test the drag lever, pull the lever towards yourself (as pictured) - this should be the max drag position. As you push the lever away from your body, the drag should lessen.
Step 6: GO CATCH FISH!